Do you need to know how to install a chain link fence around your house? A lot of homeowners pose this question when they desire more safety, privacy or secure environment for their pets. Chain link Fence Installation is one of the best options to use because it is very strong, cheap, and simple to maintain.
In this guide, indicates that a chain link fence can be installed, in the following steps. You will know all the details of acquiring the appropriate permits, installing the fence, laying wires, and completing your chain link fence project.
It is time to begin and transforming your backyard into a safe and fashionable place.
Check the best fencing contractor near you.
Why does Cary Homes use Chain Link fence?
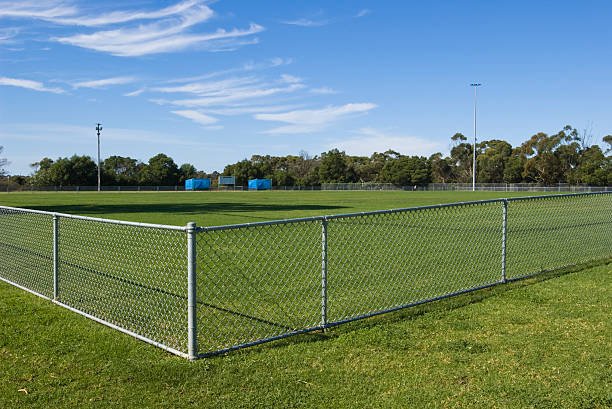
The question you might want to ask before starting is, Why do I want to install a chain link fence rather than using a wood or vinyl fence? The answer is simple. Chain link fences are hard, affordable and suitable for the harsh weather.
They can pass air freely, can look out and do not demand much maintenance. You may wish to secure your backyard with chain link fences or to identify your boundary with your property and this kind of fences goes well with the modern and traditional homes.
Here are the following steps you need to follow during chain link fence installation.
Step 1: Check Permits and Plan Your Fence Layout
Navigating Fence Permits and Local Rules
Check Fence Permits & Zoning Rules
- Review your town’s regulations before starting
- Confirm allowed fence height limits
- Verify boundary line restrictions
Confirm Property Line & Approval
- Visit your local office or official website
- Ensure your fence placement is within your property
- Get required approvals for your chain link fence setup
Call Before You Dig (811)
- Avoid costly repairs and safety risks during installation
- Dial 811 to locate underground utility lines
- Prevent damage to gas, water, or electrical lines
Marking and Measuring the Fence Line
Once you have your permit, use stakes and string to mark your fence line. Measure the area carefully and mark where the terminal posts (corner and end posts) and line posts will go. Keep your posts about 10 feet apart for the best strength.
This early step ensures your DIY chain link fence looks straight, even, and sturdy.
Step 2: Gather the Right Tools and Materials
Before you start, make sure you have everything ready. Here’s a short list of what you’ll need:
- Terminal posts and line posts
- Top rail and tension bands
- Brace bands and tie wires
- Concrete mix for setting posts
- Chain link fence fabric (the wire mesh)
- Post caps, tension bar, and fence stretcher tool
These are the key materials used in constructing a chain link fence. Fencing contractors recommends using galvanized steel materials because they last longer and resist rust, perfect for Cary’s mix of sun and rain.
If you’re unsure what size or length you need, you can contact local fencing contractor near you. We help homeowners choose the right materials for a smooth chain link fence installation in Cary, NC.
Step 3: Dig and Set the Fence Posts
Digging Post Holes and Setting Terminal Posts
Setting the fence posts is the most crucial step in building a strong and long-lasting chain link fence. This stage forms the foundation, so accuracy and proper installation are essential to ensure stability and durability over time.
- Begin by digging holes at all corner and end post locations
- Make each hole at least one-third the height of the post, plus an extra 6 inches for a solid base
- For example, a 6-foot post requires a hole about 2 feet deep
- Add a few inches of gravel at the bottom to improve drainage and prevent shifting
- Place the post in the hole and use a level to ensure it is perfectly straight
- Fill the remaining space with concrete while keeping the post aligned
- Allow the concrete to cure for at least 24 hours before attaching the fence
- This process ensures a strong, stable, and long-lasting fence structure
If you find this step difficult, fencing contractor near you can handle post setting and ensure precise alignment and professional results
Step 4: Build the Frame and Attach Rails
Adding Caps, Tension Bands, and Top Rail
Once your posts are firm, it’s time to assemble the chain link fence. Attach tension bands and brace bands to each terminal post. These will later hold the fence fabric tightly in place.
Next, slide top rails through the line post loops and connect them to the end posts using rail caps. This step completes the frame of your cyclone fence installation.
Make sure everything feels secure before you move to the next step.
Step 5: Unroll and Hang the Chain Link Mesh
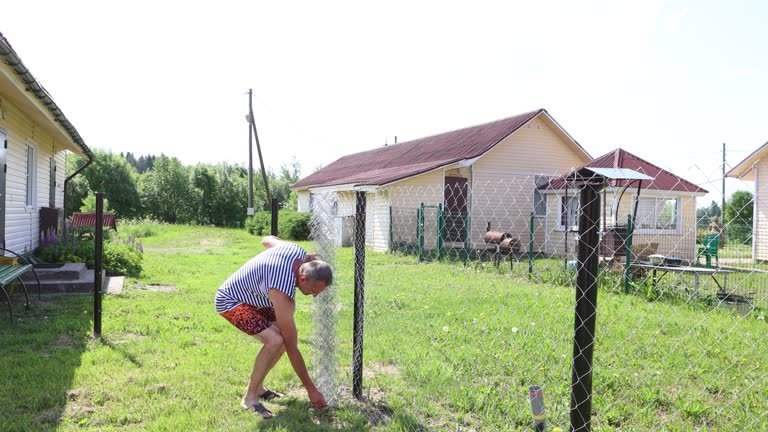
How to Make a Chain Link Fence Fit Perfectly
Take the roll of chain link fabric (the wire mesh) and stand it up near a terminal post. Slowly unroll it along the fence line. Use temporary ties or wire to hold it up against the posts and top rail.
When you reach the end post, insert a tension bar through the links. This helps in pulling the fabric tight. Attach the tension bar to the tension bands on your terminal post.
This process is the same for how to erect a chain link fence or how to build chain link fence steadily, slowly, and firmly.
If your fence is long, you might need to join two rolls. You can do this by weaving a single strand from one end into the next roll. That’s how you connect chain link fence sections securely.
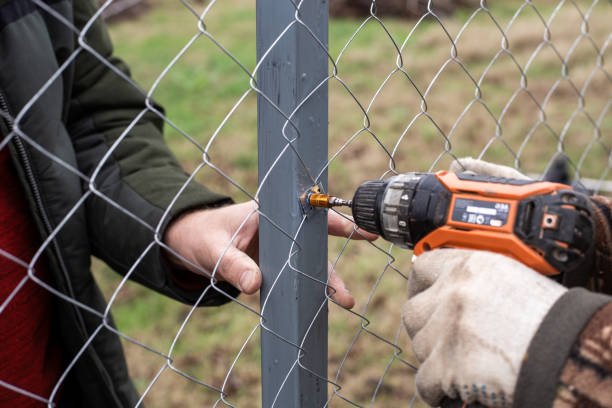
Step 6: Tighten and Secure the Fence Fabric
Stretching and Tensioning the Wire
This is the part where your fence really starts to look strong. Use a fence stretcher tool to pull the mesh tight. You want the fabric to have a small amount of give, but not to sag.
Once it’s tight enough, attach the other end using tension bands and tie wires. Make sure each line post and top rail is connected properly. This keeps your fence even and prevents it from bending in strong winds.
Learning how to wire a chain link fence or how to install chain link properly is all about tension and balance.
Step 7: Finish and Install the Gate
Final Connections and Gate Installation
Once your fabric is tight, finish by securing all the tie wires to the posts and top rail. Make sure everything feels solid.
If you’re adding a gate, install it on the gate terminal posts using the right hinges and latches. Check that the gate opens and closes smoothly.
And that’s it! You’ve just learned how to put up a cyclone fence and finish it like a pro.
But remember – if you ever feel unsure, team of local contractor can handle everything from replacing chain link fence sections to attaching chain link fence to posts or even installing on concrete.
DIY vs. Professional Installation – Which Is Better?
Installing a DIY chain fence can be fun, but it’s not easy. It needs time, the right tools, and careful measurement.
Many Cary homeowners start a project and later realize it’s harder than it looks — especially when it comes to stretching wire, digging posts, or attaching chain link fence to house walls.
That’s when it’s smart to call the pros. Fencing contractors has years of experience in chain link fence services and ensures every fence is strong, straight, and built to last.
They can handle every step perfectly — from planning permits to concrete setting. So, you don’t have to worry about a thing.
Why A Fencing Contractor near you can be the Right Choice for Your House?
When it comes to chainlink fencing near me or building a cyclone fence, fencing contractor can prove good to you. As they have expertise in there work, and they care about quality and local service.
They understand you soil, weather, and neighborhood rules better than anyone. That’s why their installations are always strong, neat, and long-lasting.
Final Thoughts
Learning how to build a chainlink fence or how to install a chain link fence on concrete can be rewarding, but it takes effort and patience.
Whether you choose the DIY way or hire the experts, a well-installed fence gives your home value, protection, and peace of mind.
So, if you’re ready to start your project contact fencing contractor near you is the best option.

Add a comment